This article describes how to enable Single-Sign On (SSO) using a SAML 2.0 connection with OneLogin as an Identity Provider (IdP).
If you would like to integrate Worksphere with OneLogin, please reach out to support@worksphere.co
Instructions
- From the OneLogin Applications tab, choose Add App

- Search for SAML Custom and choose SAML Custom Connector (Advanced)

- Enter the settings below on the Info tab.
- Display Name: Worksphere
- Rectangular Icon: A logo file is available from https://www.worksphere.co/wp-content/uploads/2020/12/Worksphere_Logo_Normal-01-025.png
-
Square Icon: An icon file is available from https://www.worksphere.com/wp-content/uploads/2021/11/worksphere_favicon_centered_1024.png
- Enter the settings below on the Configuration tab.
In the instructions below, replace YOUR-COMPANY with your company name (only A-Z and hyphens allowed) in lower case. For example, “Acme Incorporated” becomes acme-incorporated-
RelayState
(Leave blank)
-
Audience (Entity ID)
urn:auth0:worksphere-prod:YOUR-COMPANY-saml-v1
-
Recipient
(Leave blank)
-
ACS (Consumer) URL Validator
[-a-zA-Z0-9@:%._\+~#=]{2,256}\.[a-z]{2,6}\b([-a-zA-Z0-9@:%_\+.~#?&//=]*)
-
ACS (Consumer) URL
https://login.worksphere.co/login/callback?connection=YOUR-COMPANY-saml-v1
-
Single Logout URL
https://login.worksphere.co/logout
- For all other settings leave their default value / blank.
-
RelayState
- On the Parameters tab, set the option Configured by admin then add the following fields by pressing the plus button.
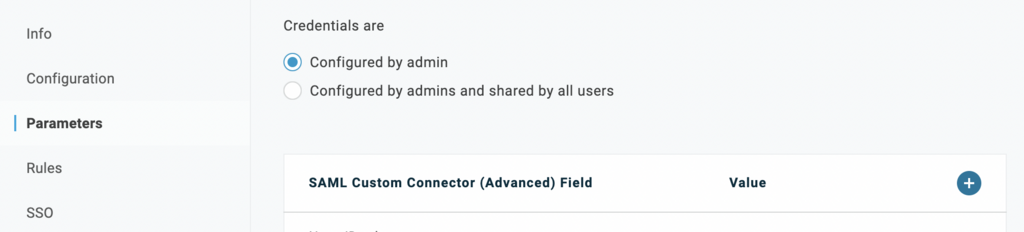
As you add each field select the checkbox Include in SAML assertion.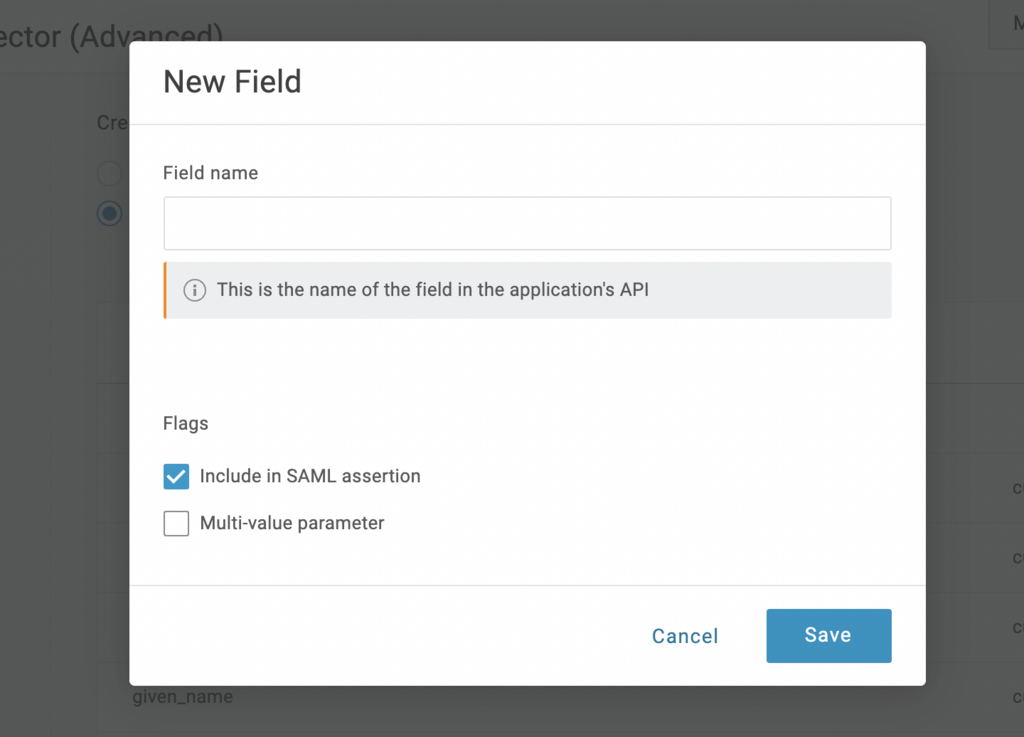
- email | Email
- given_name | First Name
- family_name | Last Name
- name | Name
- nickname | First Name
- picture | Profile Picture
- email_verified | - Macro - | true
For email_verified use the - Macro - option and set the value to true: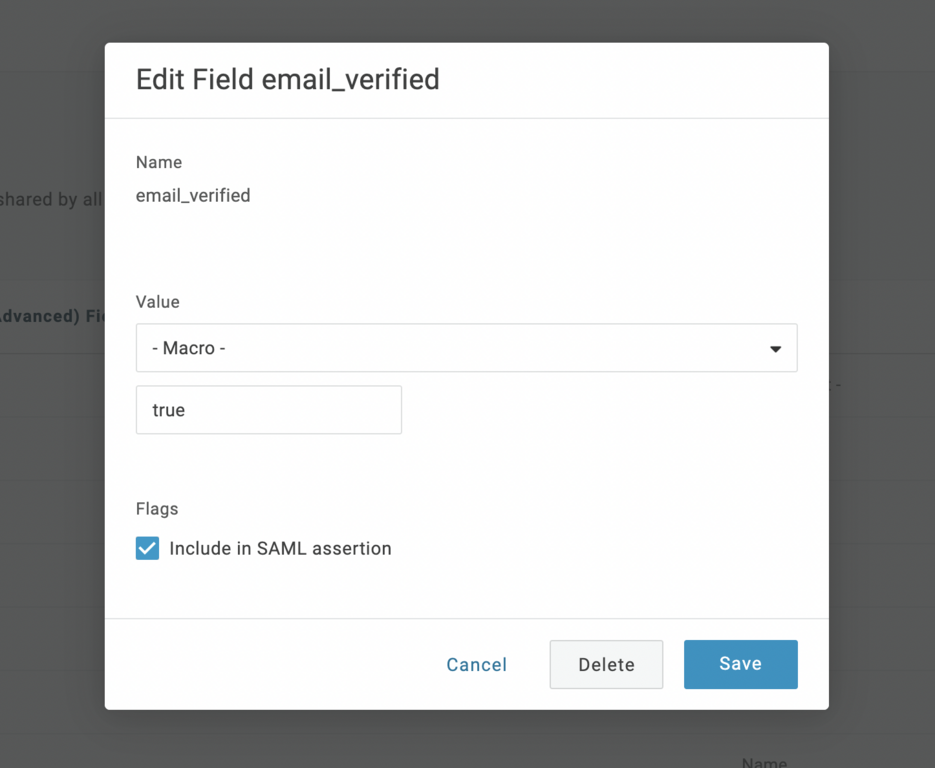
The finished fields should look like this: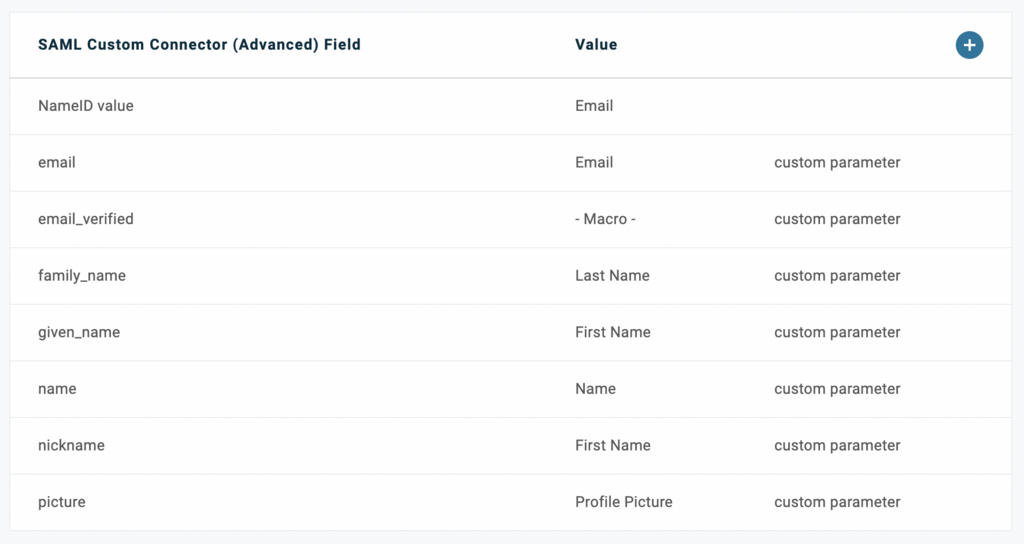
Press Save in the top right once all Parameters have been added.
- On the SSO tab:
- Right click View Details to open the certificate details in a new browser tab.
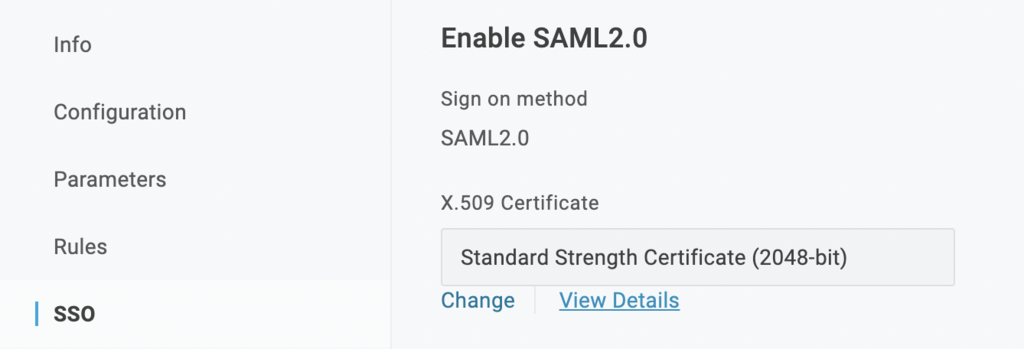
- Press Download for the X.509 PEM certificate.

- Back on the SSO tab, copy the Issuer URL, SAML 2.0 Endpoint, and SLO Endpoint.
You will need to send this information along with the X.509 Certificate to your account representative at Worksphere. The Worksphere team will use this information to set up the SAML connection within Worksphere so that it is ready for use.
This action needs to be done by the Worksphere team and is not self-service.
- Right click View Details to open the certificate details in a new browser tab.
- Send the information and certificate from Step 6 to your Worksphere account representative. Also include the Audience (Entity ID) and ACS (Consumer) URL used in Step 4.
Next Steps
The Worksphere team will let you know once the connection has been set up and is ready for testing.
IMPORTANT: It is recommended to only enable the app for OneLogin users that will be used in testing the SAML connection.
Only after the connection has been tested end-to-end should it be enabled in for other users or groups.